This process if for Libcode version 6.79 and earlier. Version 7 users should be using the Z39.50 module in Imports/Exports from the main menu.
Inloading data from SCIS is a three part process:
- Downloading resource data from SCIS Website.
- Inloading SCIS Data into LibCode Suite.
- Editing SCIS records.
Downloading from the SCIS website…
Firstly, edit the following setting in your SCIS profile. Do this well prior to SCIS-ing.
- Go to the SCIS homepage at https://www.scisdata.com
- Click on the Login button.
- Type in your user name and password then click Login. (SCIS provide you with your username/password)
- Check your Profile settings by clicking on the drop down arrow next to your school name in the top right corner.
- Click on School/Organisation Settings.
- Scroll down to Download Preference.
- Click on the Separate MARC records and cover images option.
- Click on the Save Changes button at the bottom of the page.
- Your SCIS webpage may take up to 2 hours to refresh.
NB: This is a one-off process, if this has been done start at No 10 below.
After settings have refreshed…
- Log back into the SCIS homepage.
- Click in the box under “Scan or enter ISBN….” and scan or type in the ISBN numbers of the resources you are cataloguing.
- After you have entered a few ISBN’s (and checked the accuracy), click on the Create request button at the bottom of the page.
- A request number will be generated and Matched and Unmatched records displayed in separate tabs.
- Remove all the resources from your pile that have the ISBN’s listed in the unmatched list. (You can search for them in the Search tab later.)
- Click on Download Records and the file will automatically saved to Downloads (*.mrc file).
- Do the same for the Download Images folder. It will be an images zipped file.
- Close or minimize the SCIS webpage.
Inloading data to the LibCode Suite…(version 7 users should be using Z39.50)
- Inload the mrc file through Utilities > Inload / Outload > Inload Usmarc Records.
- Change the Files of type at the bottom of the open window to look at all files (not just dat files)
- Browse to the location you saved the mrc file to (e.g. Downloads)
- Locate and click on the mrc file and then Open.
- If the message ‘SCIS record with title …. has already been processed’ appears, click ‘No’ to skip the record.
- To inload the cover images, click on Utilities > Inload / Outload > ‘Extract SCIS Cover Images’.
- Locate the zipped images file, double click and choose ‘Yes’ to extract the Cover Images. Choose ‘No’ if the message ‘Extract 0 Cover Images’ appears.
- When the download is complete, choose ‘Yes’ at ‘Do you wish to delete image file?’
- Run the Data Entry Module and select the SCIS / Edit option to finish processing the inloaded records.
Editing a SCIS record…
Once your SCIS records have been inloaded into LibCode Suite using Utilities > Inload/Outload > Inload USMARC Records, the records are in the database and can be displayed (filtered) in the Data Entry module ready for checking and the addition of further details if necessary.
- To view un-edited SCIS records open Data Entry and click on SCIS > Edit (or press Ctrl+S)
- Or just type a few letters of the title you are looking for and call it up as you would any other catalogue record you wanted to edit… the Ctrl+S thing is just a shortcut!
- This will filter out the list of records needing checking and further cataloguing details i.e. barcode details and if necessary additional subject headings, keywords, and notes.
- Check the number of filtered records at the bottom of the screen to make sure:
- You haven’t inloaded your order more than once.
- Have been removing the # symbol in the SCIS No. field after editing each entry (this is done automatically by the software at your approval… you know the message… “If you have TOTALLY finished editing this catalogue record…Do you wish to remove the # character….”
- Locate items in the list by either double clicking on them to show the details screen or highlighting them and then click on the Cat. Details Tab (ALT + C will give the same result).
Once the Cat. Details screen is displayed…
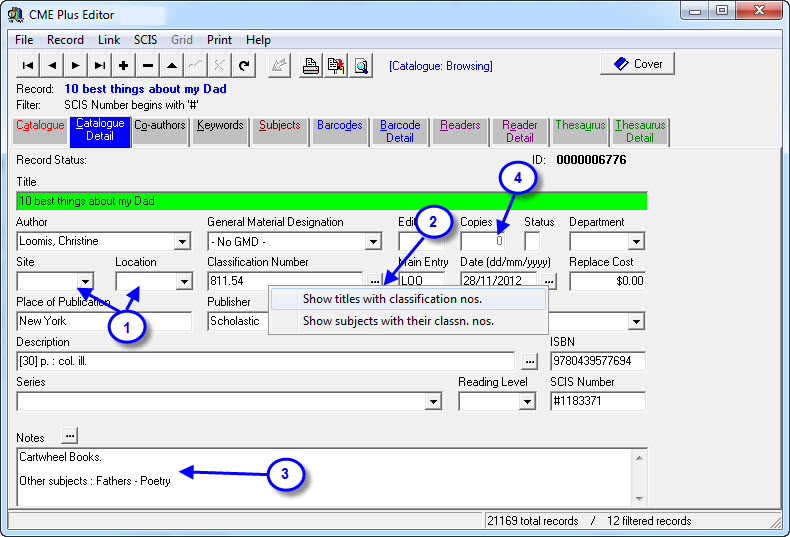
- Is there enough information, does it suit your library and users?
- What are the Site and Location details for this resource? Where will it be stored?
- Is the suggested dewey appropriate?
- Will the borrowers find this book using this dewey?
- Are there any other resources like it with the same dewey number?
To check, click on the button and have a go at the options you find.
- Do any notes need to be added to this resource?
- eg… Is it for senior students only?
- Contents may have some language inappropriate for some borrowers.
- Is it part of a Reading Quest?
- You will notice that until barcode details are added the Copies = 0
- If any changes have been made to the Catalogue Details and you forget to F9 to save, or click on the tick before you go to the next TAB you will be asked the following:
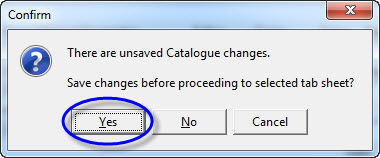
Another screen will then appear -

Until ALL of the details relating to this record are entered DO NOT remove the #. This is what makes unfinished SCIS inloaded records special. You will be given the opportunity to remove the # each time you save new information on the record…including after adding the barcode details. (Once the # is removed the item is placed into the main stream catalogue and can no longer be filtered out using the SCIS / Edit option. To recall this resource you will need to use the title or some other “normal” detail on the record.)
- Add Co-Author and Keyword details if necessary.
- Check the Subjects, are there enough? There is no practical limit to the number of subject headings that can be attached to a resource, so add as many as you feel is necessary, in order to allow the resource the best chance of being located by your borrowers.
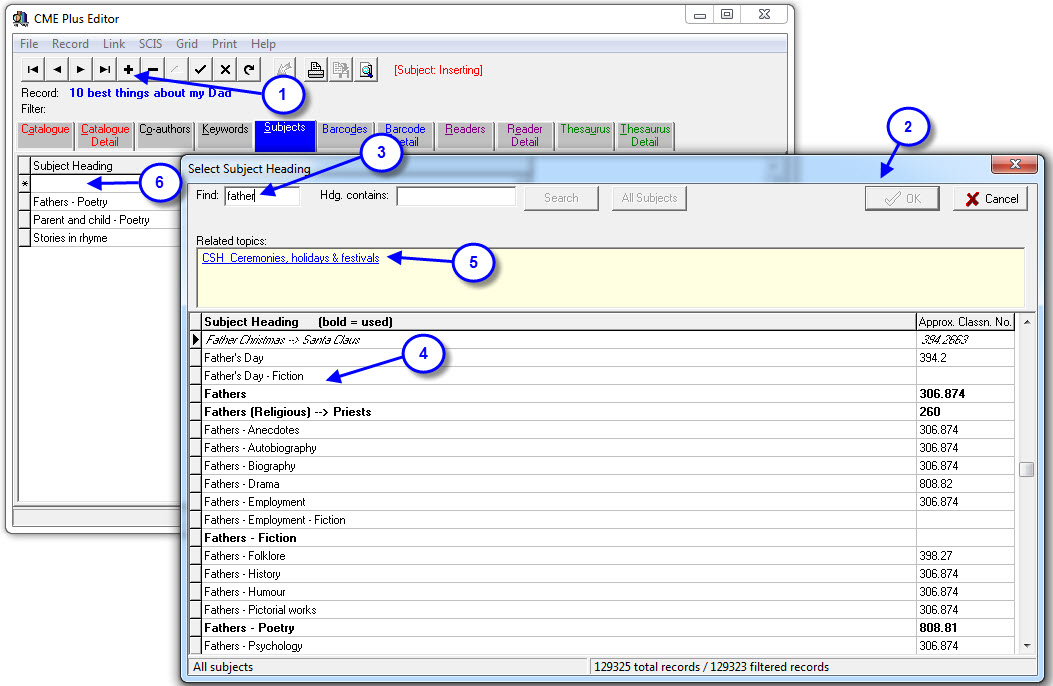
- To add another subject heading click on the + button or press F2.
- The subject selection box appears.
- Type in the first few letters of the subject heading you’re looking for.
- Highlight the heading you want and click OK, hit <Enter> or Double click to add the heading to the resource.
- You might like to look at other subject headings with the same Concept Codes / Related Topics for ideas… just double click on one of the entries displayed.
- As you select headings to be added they will appear here… once they are in the list they are saved.
- Add the barcode details.
- Click the + button to add a new entry (or press <F2>).
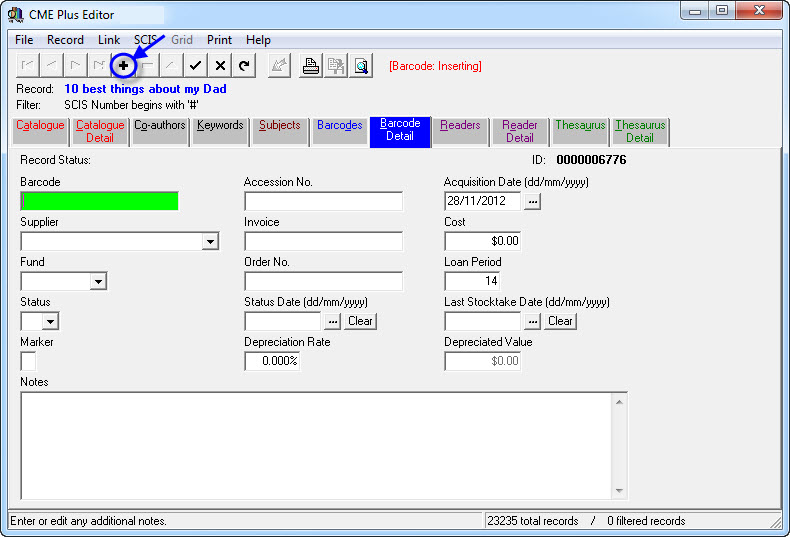
- Once you have added these details, save the changes and this time remove the # symbol and the record is now available to researchers in the Enquiry module.
{ 0 comments… add one now }