Reports relating to the circulation of resources are done here, including Loan History (Returned Loans).
Reports include:
- Current Loans… print out a list of current loans using the filter options to narrow down and sort the required information.
- Overdue Loans… list of overdue resources for groups or individual borrowers without values.
- Returned Loans (History of loans)… print historical reports for groups or individual borrowers.
- Unreturned Loans… as a normal report or you can generate pro-forma letters for printing on your organisations letter head to fold and post to borrowers (with or without values).
- See Statistics to create lists of resources borrowed by a particular group or borrower during period of time.
Once a report grid has been displayed, you can re-sort the data using any of the column headers.
- Click on the column heading to re-sort.
- You will notice that the column heading is now in bold to identify the order of the data.
This data is currently sorted by GROUP.

It is also possible to highlight multiple lines by using CTRL+Click or Shift+Down Arrow.
- After highlighting several loan records you just click the Show Sel. Only button to reduce the displayed list to show only the selected items… (strange but true!)
Tags: reports, create reports, create a report, print a report, how to make a report, generate a report, generating reports,
There are sooooo many examples of what you might want to do with this report!
Obviously we can’t cover them all BUT if you email us the reason and a description of why you do it, we’d love to write more instructions for other people to discover!
Once you go into the Current Loans report you’ll get a list of ALL Current Loans on the screen.
Now that you have this info you can use Filters and even specifically highlight loans to actually print.
Selecting specific Loans from the list…
You can Hold Down the CTRL button and click loans or hold down Shift and use the Down and Up arrows to highlight items… then use the Show Sel. Only button to make all the other loans disappear.
Using the filter options…
You can select only those loans that your interested in.
In this example I would like to know anyone in Group B01 currently has loans so I drop down the Filter list and select Group as the field I want to filter… I can then choose how to Filter (Begins With, Equal to etc) and type in some search characters in the blank box to the right of that… click Filter button and presto… ready to print.

- As you can see from the screen display you have the option of:
- Including or excluding staff in your report by checking / unchecking the box.
- Using an Abridged or single row report by checking / unchecking another box (uses less paper!).
- Group was selected from the filter option and B01 was entered as the specific group.
- If you only want to produce a list of some of the borrowers displayed after setting a Filter, you would use CTRL + Click to highlight the records you want then click on the ‘Show Sel. Only’ button… your list will be shortened.
- If you want to set a new filter for searching you must ‘Clear Filter’ first to reset the search.
Tags: current loans
This report will generate a list of overdue loans (up to a designated date) WITHOUT COSTS. The range is useful to keep a track of how many overdue notices have been sent to a borrower, ie. 1 month overdue notice, 2 month overdue notice, 3 month overdue notice, it’s time to pay up notice…
Usually the Overdue Loans report is the standard list generated for requesting the return of resources. It can be done as a Group or Year Level list for distribution with rolls or by individual borrower.
Example..
To print of a list of overdue loans for students in Level 11:

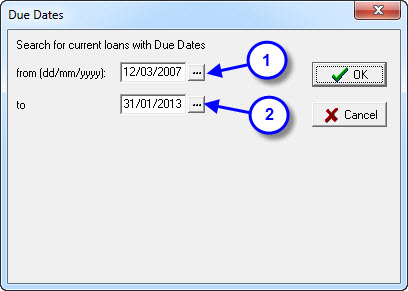
- Set the ‘from’ due date parameters if necessary… the default value should automatically be the oldest due date of any outstanding loan in the system. You may be interested in loans with a specific due date range. Otherwise leave the default dates.
- The ‘to’ should default to yesterdays date (if it’s due today… it’s not yet overdue!) and may be changed if you’re only interested in resources that were due back last month (etc). Change the dates manually or click on the … button to change the date or click OK to accept what is displayed.

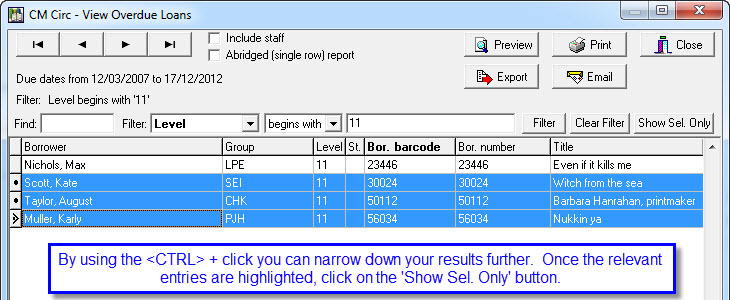
- As I am only interested in Students, Include Staff has been unchecked (click to change). Don’t forget to click the Abridged report option… it saves paper.
- The Filter has been set to Level = 11 (this is actually a Begins with search so if you put a 1 in there (for High Schools) you would get Level 10, 11 and 12 students). You can change the filter from ‘begins with’ to another operator if necessary (see your report screen for details).
- The data has been re-sorted in Borrower Barcode Order by clicking on the column header… data is instantly re-sorted as you click the column headers…
Don’t forget you can use the Show Sel. Only button to restrict the displayed (and reported) data to only records you highlighted using Shift + Down arrow or Ctrl + click…

Tags: overdue loan, overdue letter, overdue notices, overdue report, overdues report
The first step to emailing overdues to your students & staff is to setup the basic email settings that we have built into LibCode Suite. If you are unsure as to what these settings will be, ask your IT Technician and he or she should be able to tell you.
Setup Email Settings
- Load Utilities.
- Select Setup – Send Mail Setup.
- Enter your host e.g. mail.ilisys.com.au & then enter your email address in the ‘From’ box.
- Click ‘OK’.
And that’s it now, you can email all your overdues.
Emailing Overdues / Unreturned Loans
- Open Circulation module.
- Choose Reports, Overdue or Unreturned Loans.
- Set Search Dates and click OK.
- Untick ‘Include Staff’, if you only want to view student loans.
- To view selected students, highlight the student (s) (Shift & arrow down or Ctrl & click).
- Click ‘Show Sel. Only’ button.
- Click Email button.
- Choose Include Costs.
- Edit subject and message and save.
- Click Send Email.
- Click OK at Emails Sent screen.
Note: If you do not have your borrowers email addresses inloaded into your database, contact our office to find out how this can be done.
Tags: email overdues, email unreturned, emailing overdues and unreturned, send mail setup
There are several ways to check Loan History in LibCode Suite.
Reports:
Go into the Circulation Module > Reports > Returned Loans Report. This gives you a report on the screen of ALL history between certain dates which can then be manipulated for any purpose… be that a Resource history, Borrower history, Group history simply by setting filters and clicking column headers.
Lend Screen:
Go into the Circulation Module > Reports > Returned Loans report.
View Screen:
Go into the Circulation Module > View > Borrower or Title and once displayed click the History or Returned Loans button.
Tags: returned loans, loan history, history of loans
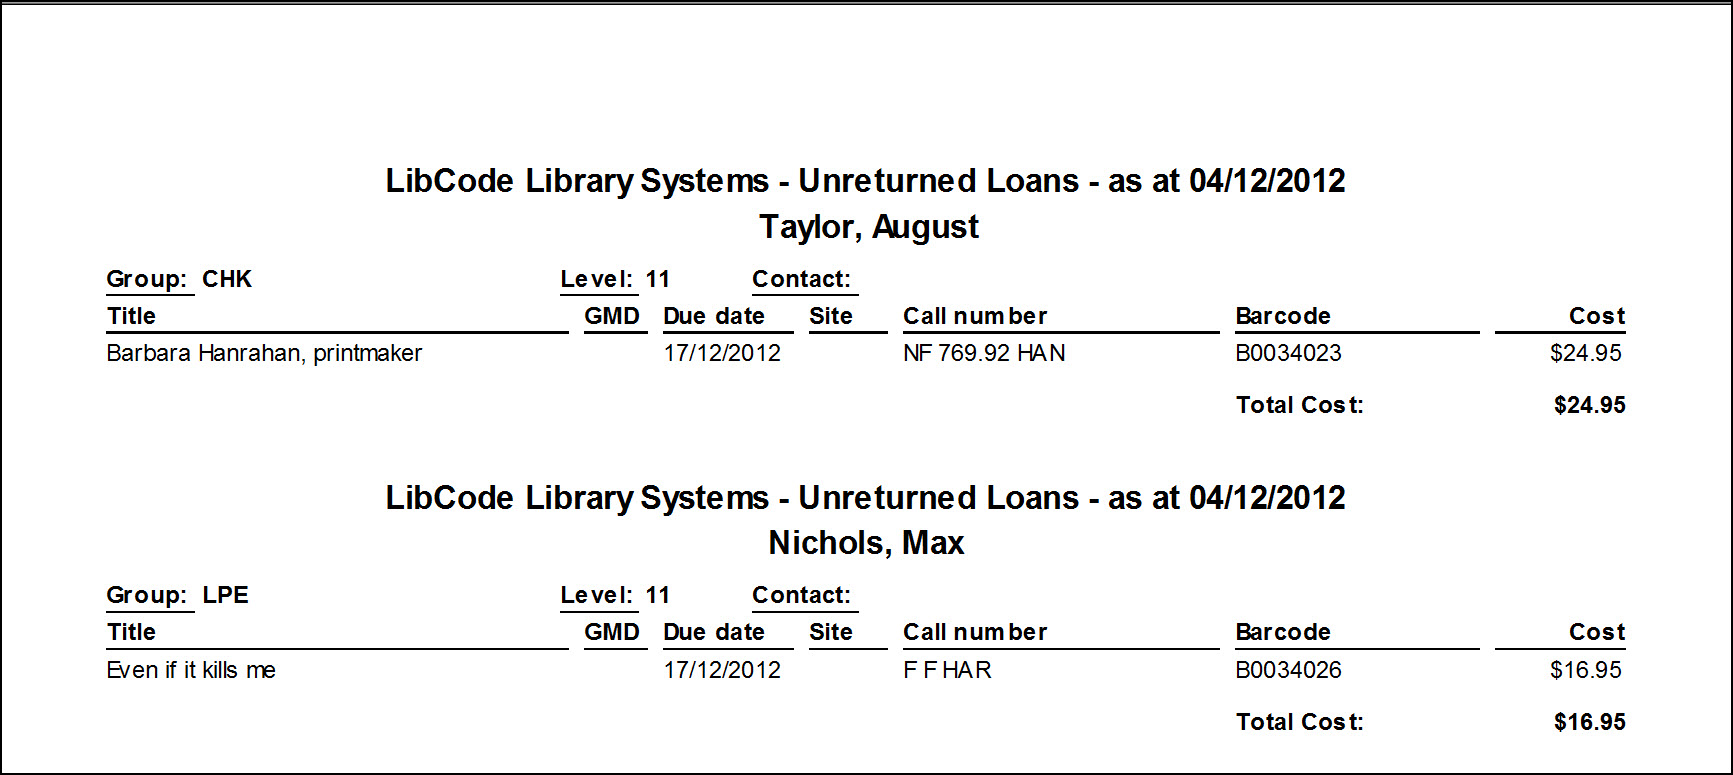
This report is used when it becomes necessary to print off lists of unreturned resources with costs.
As long as you added the cost of resources when you were cataloguing, the unreturned list can be very motivating for borrowers to return overdue loans once they can see how much they may have to pay for replacements… parents find it particularly motivating!
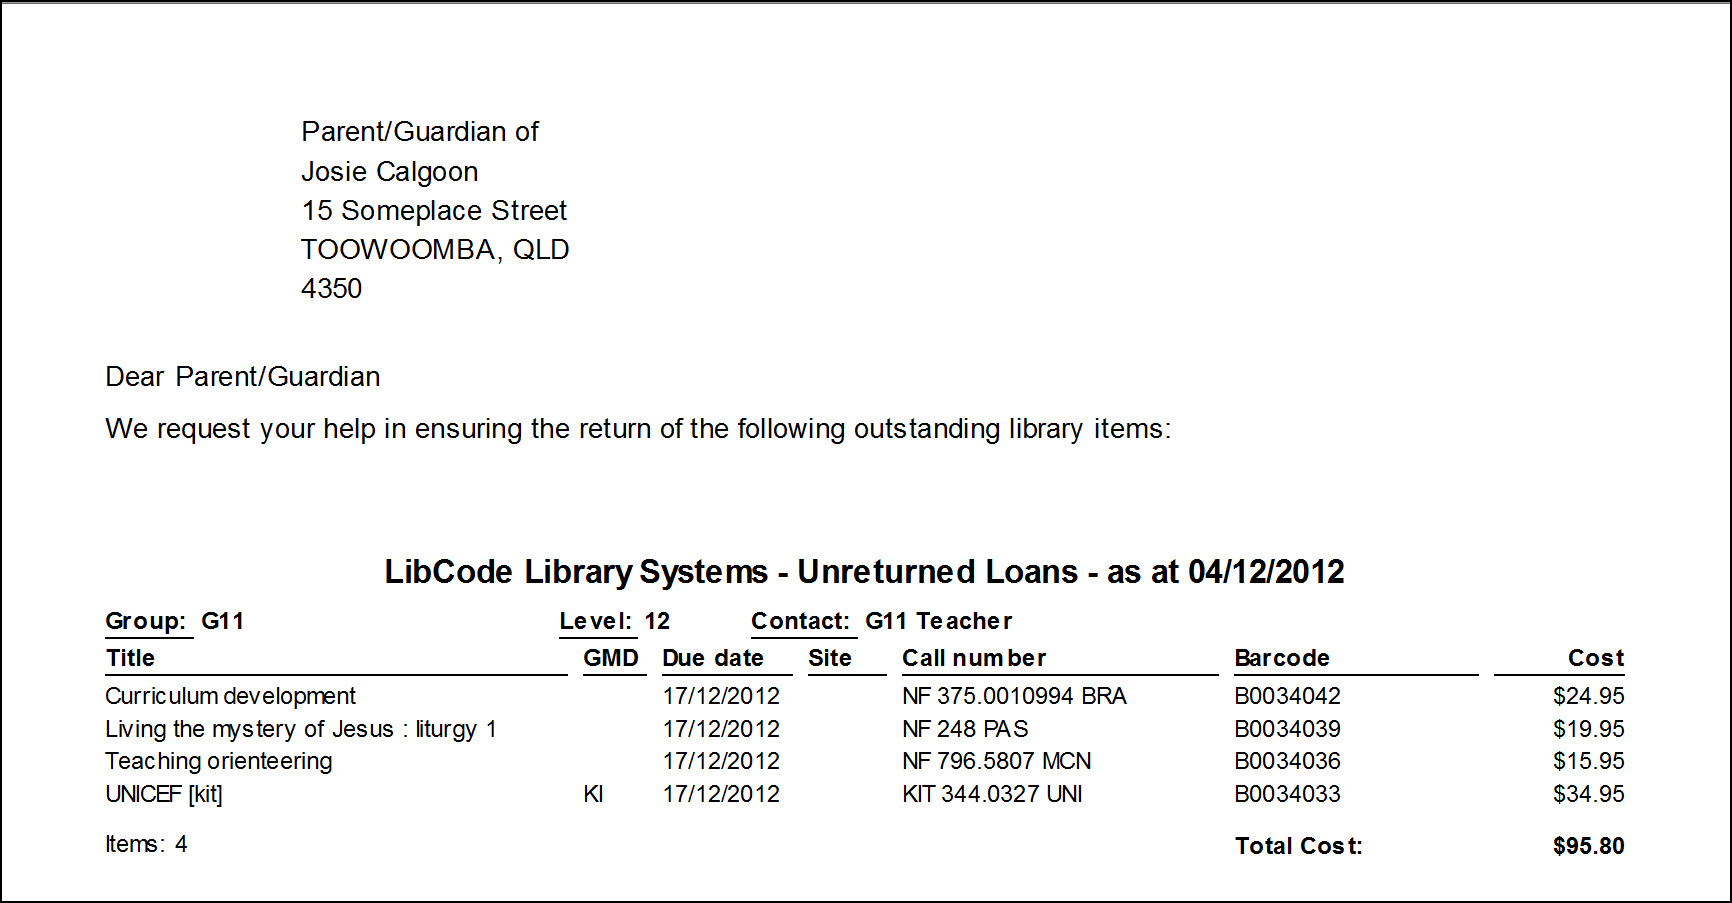
There is also the option of printing letters addressed to either the borrower or their parent/guardian on letter head for posting. (This is particularly useful if you have address information under the borrower details.)
The two reports:
Unreturned Report (Click here for more details)

Unreturned Report – Letter format (Click here for more details)

Tags: loans not returned, unretruned loans
These instructions will step you through creating a buffer file from any Circulation Report. Once this buffer file has been created it can be used to bulk lend, return and extend items, move to different locations or even write off.
- Load the Circulation report of your choice.
- Filter the report to show the loaned resources that you would like to create a buffer file with. These items may be on loan to a particular borrower, class or room.
- Once you have selected only the resources you would like in the buffer file, click ‘Export’ across the top.
- When prompted click ‘No’ which is the option to export only the barcodes to a buffer file.
- Save this file with a memorable name in a memorable location.
Now that the buffer file has been create you can use it how you would like.
Tags: create buffer file from circulation report, buufer file, circulation buffer file, circulation reports export


{ 0 comments… add one now }