Go into Circulation and click the Groups button
Groups are displayed in order with ‘No Group’ as the lowest value, followed by groups beginning with a numeral, then those beginning with a letter.
Find
- To locate a particular group, begin to type in the group name and the list will change as you type.
Filter
- Group information can be found using the filter option.
- Select from the drop down list in the Filter box the field you’re interested in and then type in the search string.

The data displayed on this screen can be sorted by any column containing an * against the column name and any column can be moved to change the way the data is displayed. See Borrowers/Resorting Columns.
Tags: add groups, change groups
Adding Groups …
Manually…
- Go into LibCode Suite and then load the Circulation module.
- Click on the Group button on the Circulation screen.
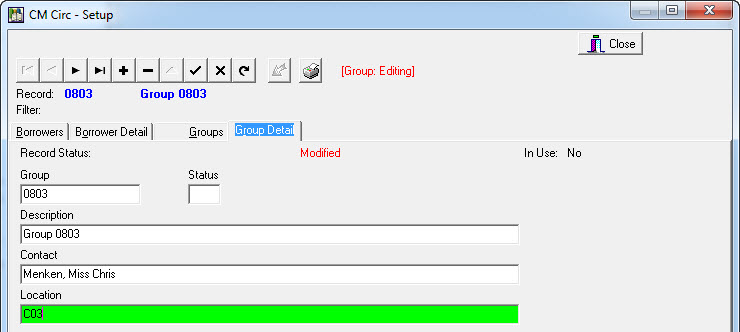
- The Setup screen will appear. Click on the + button to add a new Group…
- The Group details screen will appear… go ahead and add necessary details.
- Click on ‘Tick’ or Press <F9> to Save changes.
Editing or Changing Group details…
From time to time you will need to adjust group details such as staff changes, split classes and room changes.
- Go into Circulation.
- Click the group button.
- Locate the group using either:
- The find option by typing in the first few characters of the group name.
- Selecting another filter option from the list provided and typing in the search terms then clicking on the Filter button.
- Once you have located the required Group from the list provided double click on the entry to show the details screen.

- Make the necessary changes and <F9> or √ to save the changes.
Deleting Groups
- Go into Circulation.
- Click the Group button.
- Locate the Group using either:
- The find option by typing in the first few characters of the group name.
- Selecting another filter option from the list provided and typing in the search terms then clicking on the Filter button.
- Once you have located the required Group from the list provided double click on the entry to show the details screen.
- Click on the – (minus symbol) across the top and click ‘Yes’.
Tags: add group, add groups, adding, editing and deleting groups, change groups, edit groups


{ 0 comments… add one now }