Videos and DVD’s often have multiple programs recorded on them. The individual programs may not be about the same topic therefore each program should be catalogued as a separate record complete with the relevant subject headings so it can be found by researchers… but… when you lend out the tape (or disc) all the programs need to come up as on loan. Linking records is the answer…
Firstly you must catalogue the Video (DVD)
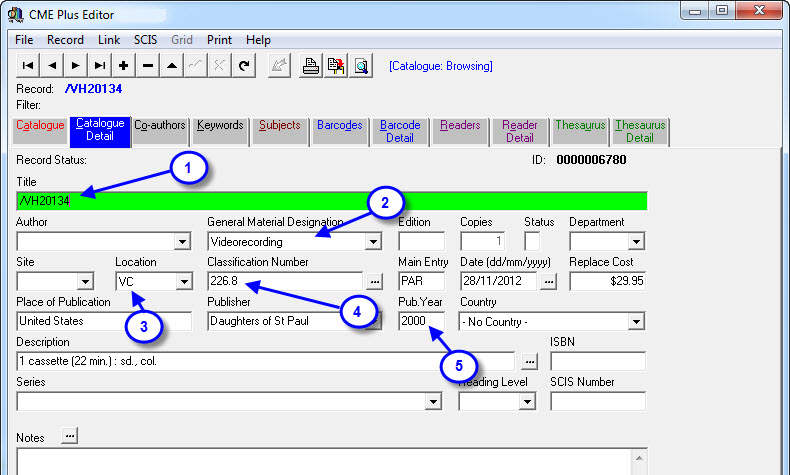
Here is an example data entry screen for a Tape / Disc (Master) entry:

- Type in a title for the item. The example here is “/VH20134″ which is the actual tape number. Some people have used “/VH20134 (Video Tape)” as a title so users recognise it at a glance… your call… just add, make a decision so you can be consistent!
- The GMD has been set to Videocassettes, VHS… obviously this would simply match the type of resource you are adding. (If you need to add to the types of resources in the GMD list you do that through Utilities > Setup > GMDs…)
- Site and Location is set to whatever describes where the tape is stored… in this case the tape is in the Resource Centre (so there’s no Site) and in the VH section. (Add Sites and Locations to the lists via Utilities > Setup > Site… OR Utilities > Setup > Location…)
- Type in a Dewey number if your tapes are stored by Dewey (which is rare because it is VERY difficult to fill a tape / DVD with programs all of the same Dewey!) so… we suggest you simply put the Tape / Disc number in here and shelve them numerically (feel free to use VH20134 if you think it’s less confusing for researchers!)
- The Publication Year should be set to the year you first used the Tape or Disc. This way you can chase up the 15 year old media resources and re-copy them before they actually turn to dust!
The remaining fields are left blank unless you have thought through the process and have found a useful addition… in which case you should send us the details so we can include your suggestions in this manual for other users!
Save the details on the Catalogue Detail tab by pressing F9 or clicking on the  .
.
There is no need for Co-Authors, Keywords, Subjects on this “Master” record… just go straight to the Barcode Detail tab to add a barcode… (Alt + B).
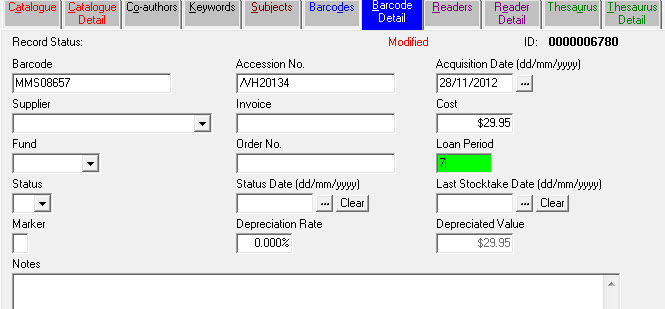
This dummy record is given minimal barcode details…

…as you can see a Barcode, Accession No. (again the Video Number is used), Acquisition Date (roughly when the media was first used) and the Loan Period are the only fields that were set… and that’s it for the Master record. Now for the programs that are on the tape / disc…
Cataloguing the programs…
The first program on this Video might be about mammals and would be catalogued like so:
- Locate the parent record using the find option in the data entry screen, in our case it has a title of /vh20134.
- Click on the Cat.Details Tab to view the details. Now click on the Link option at the top of the screen and select Add Link…

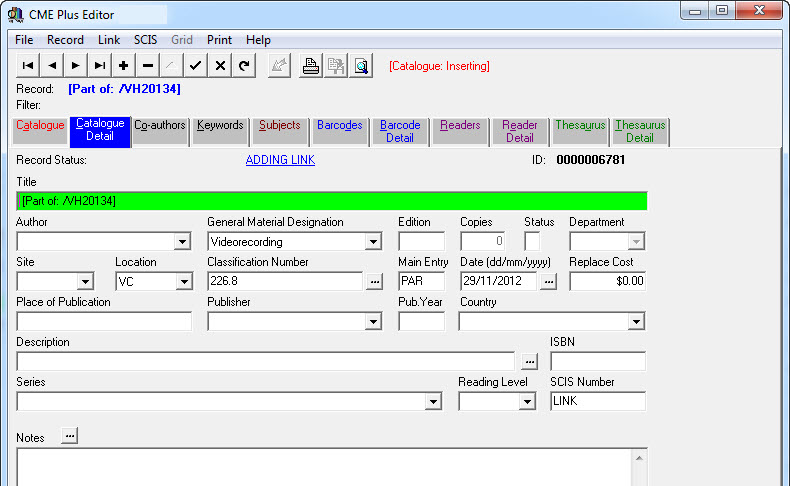
- The screen below is what appears after you click the Add Link option:

- Now you just type in the details specific to the first program… (not that it matters what order you actually enter the programs)

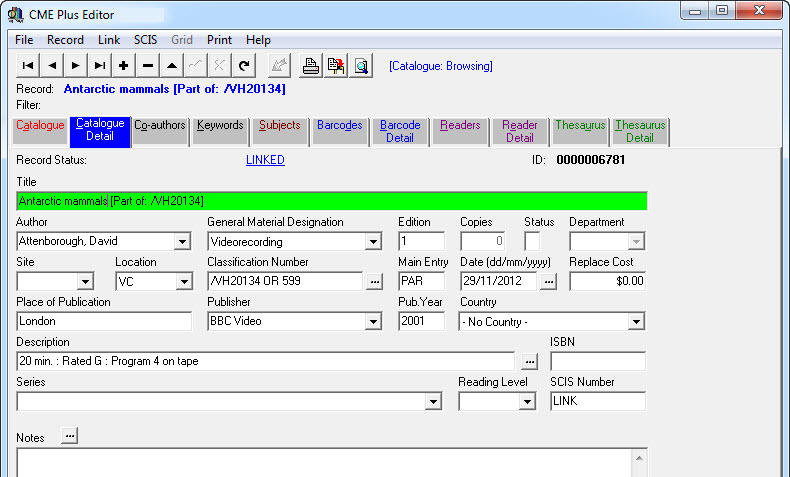
- Things to notice about this screen:
- Title of the program is typed in front of the [Part of...] details.
- Author details have been added (Co-authors should also be added if necessary).
- The Dewey field has the Tape / Disc number as well as an approximate Dewey to help researchers find other useful items (remember… what goes in here depends on how you store the items…).
- Site, Location, Dewey (except additional info) and Main Entry MUST stay the same as the tape / disc “Master” record so you know where to find the items… (there is a function to reset the Site, Loc, Dewey, Main Entry of Linked records back to the Master record details in Utilities > Update > Catalogue > Links > Update Call Number).
- Description has the length of program, Rating and Program Number… feel free to add other info here.
- Series should be added if appropriate.
- The LINK entry in the SCIS Number field is the thing that lets the software know it’s a special record… don’t remove it!
- Feel free to add Notes…
- Things to notice about this screen:
- Co-authors, Keywords and Subjects should be added to each program record as if they were a normal catalogue entry (because they are!).
- No barcode is given to the individual programs… feel free to try but you’ll just see a little reminder…
- When you have finished adding a Linked record and want to add another just go to the Link > Add Link option again… you don’t need to go back to the Master Record to continue the process.
- This allows you to take full advantage of the F4 Recall Details function to speed up data entry if you are entering several similar programs.
Tags: link dvd, link video, linking records for a dvd or video

{ 0 comments… add one now }